
NSX-T 2.4.x manager is an appliance with 3 built-in roles: policy manager, manager, and controller. The management plane contains the policy and the manager roles. The central control plane includes the controller role.
The NSX-T manager cluster is formed by a group of three manager nodes. The desired state is replicated in the distributed persistent database, providing the same configuration view to all nodes in the cluster.

The NSX-T manager cluster is highly available and is configured in the following way:
- All managers should be on the same subnet.
- One manager node is elected as the leader.
- The cluster’s virtual IP address is attached to the leader manager.
- If the leader fails, the two remaining managers elect a new leader.
- The cluster virtual IP address is used only for northbound traffic. Southbound traffic to hosts uses the physical IP of the node.
- A single virtual IP address is used for API and GUI client access.

With this introduction, let’s see how we can configure a 3-node NSX-T 2.4.1 manager cluster.
In a previous post, I wrote a step-by-step procedure to deploy a NSX-T 2.4.1 manager. To configure the cluster, we will deploy two additional NSX-T manager instances from the GUI interface of the first manager.
Begin by logging on to your NSX-T manager UI interface with the admin credentials via https://<NSX_MGR_IP Address or FQDN/
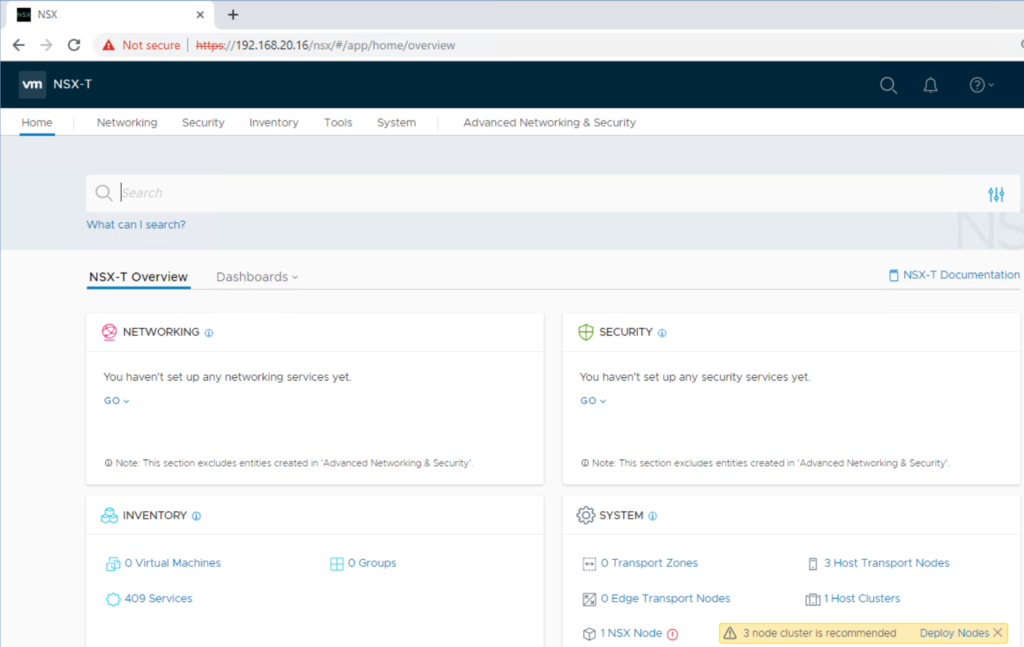
Navigate to System > Overview. Notice that we have only one NSX manager and there is no virtual IP set.
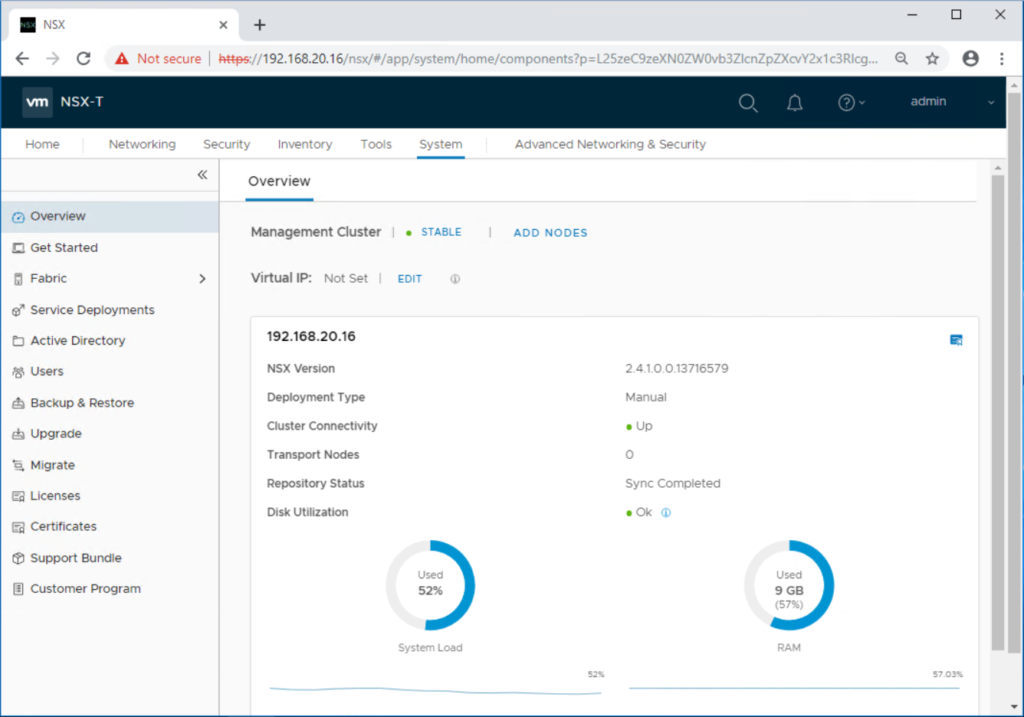
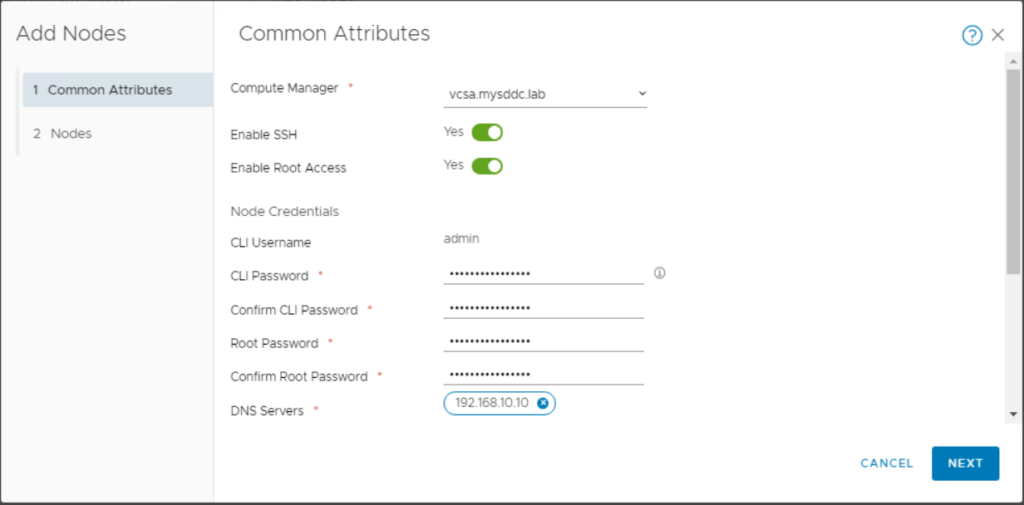
Click on ADD Nodes. Configure common attributes such as:
- Compute Manager
- Enable SSH/Root Access
- Admin/root account passwords
- DNS/NTP Servers
- Form Factor (Small, Medium, Large)
Click Next. In the Nodes section, add two nodes and specify their configuration details: Name, Cluster, Datastore, Network Portgroup, and IP address details.
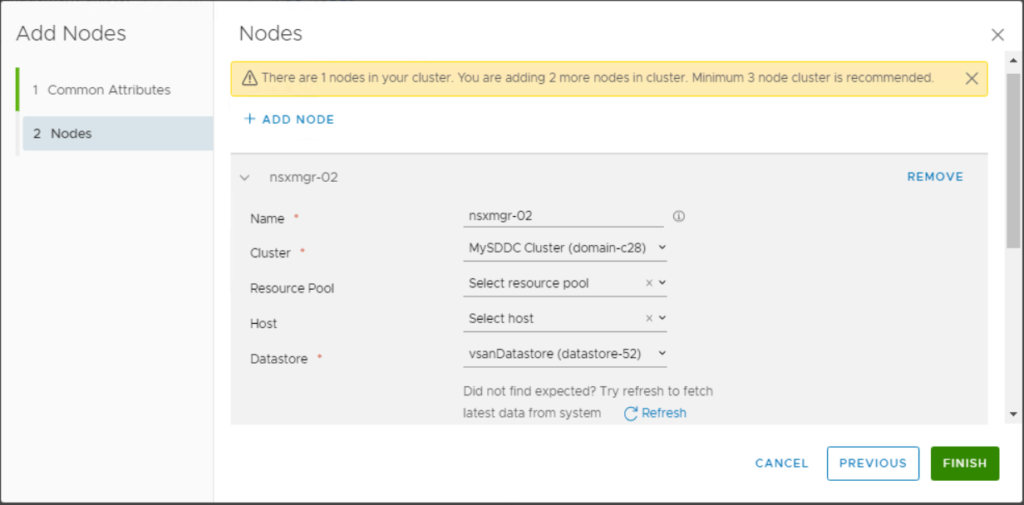
Click Finish and your NSX-T Data Center management cluster will be automatically formed.
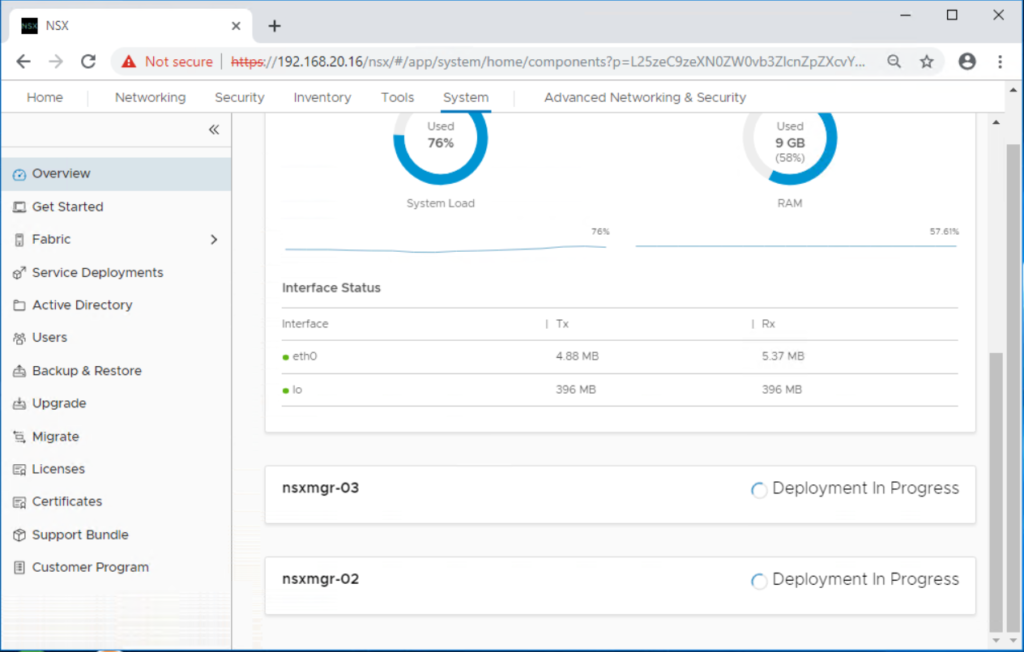
You can see now that the deployment of the two NSX-T manager instance is in progress. Wait for the process to finish.
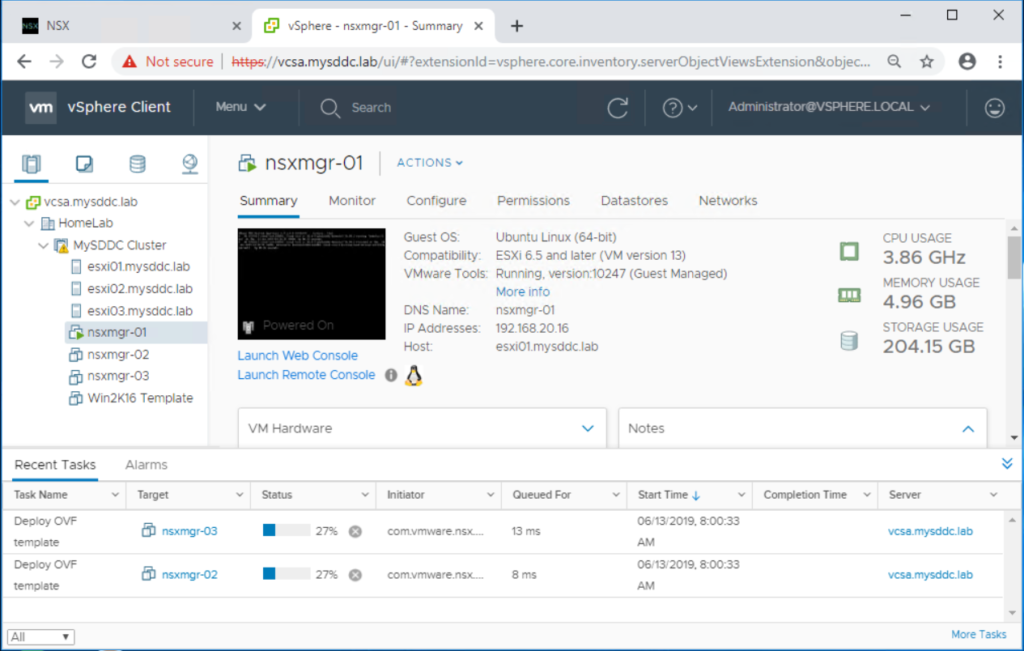
The progress can also be monitored from the Recent Tasks pane from the vCenter UI interface. After the two OVA appliances get deployed, they will be powered on automatically.
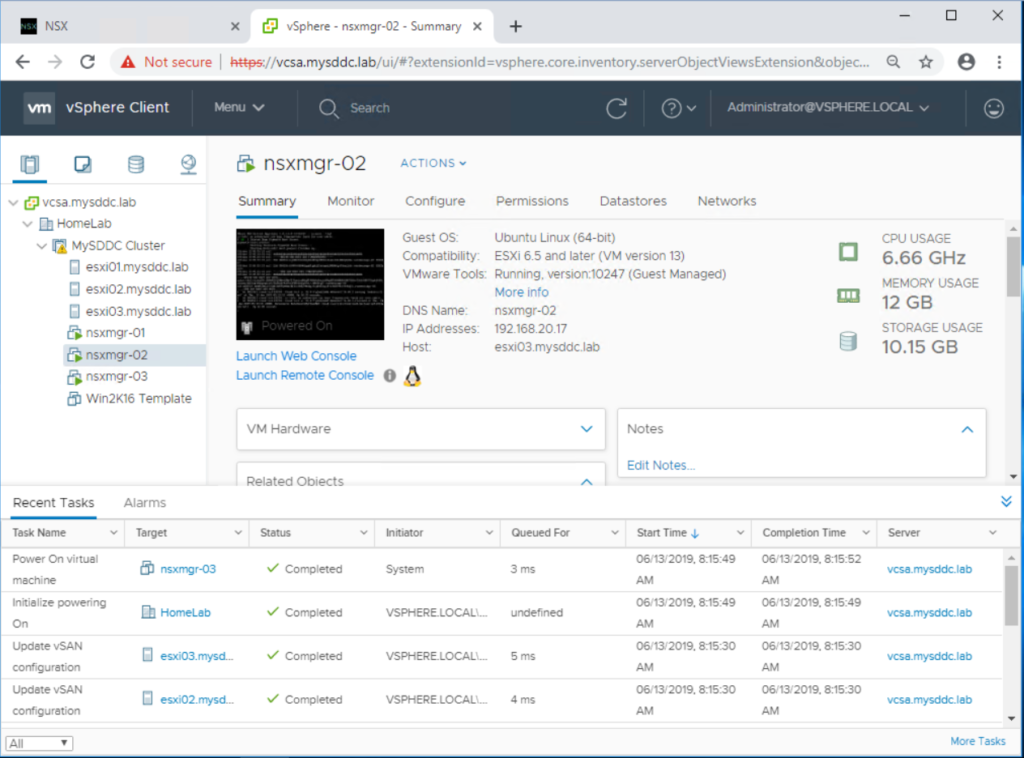
Go back to the NSX-T UI interface and navigate to System > Overview to make sure the 3 NSX-T nodes are up and sync completed between the cluster nodes.
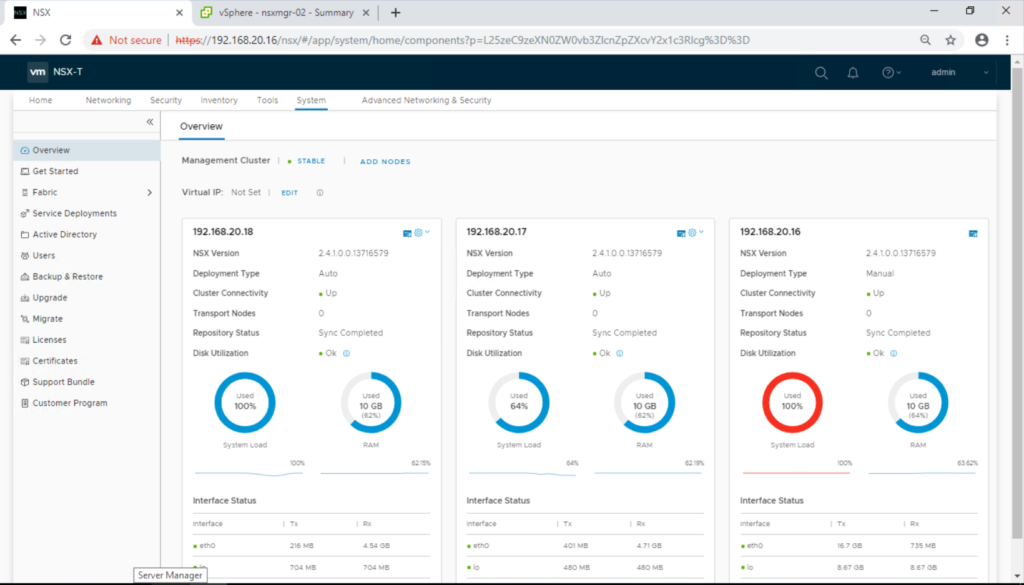
Now it is time to configure the virtual IP address of the management cluster for load balancing and high availability purposes. Click Edit beside Virtual IP, write down your IP address and click Save.
You might need to wait a few minutes for the newly configured address to take effect.

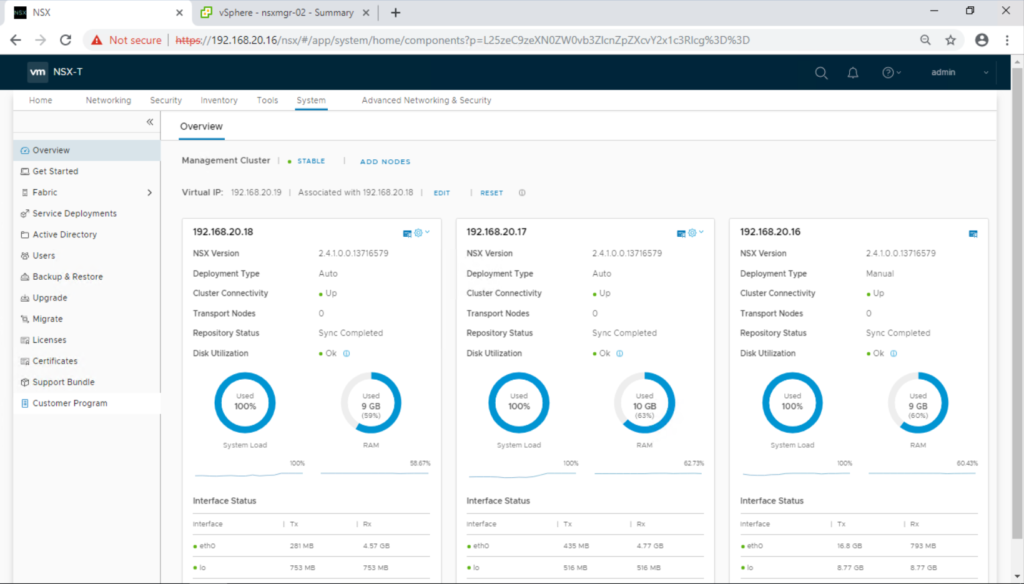
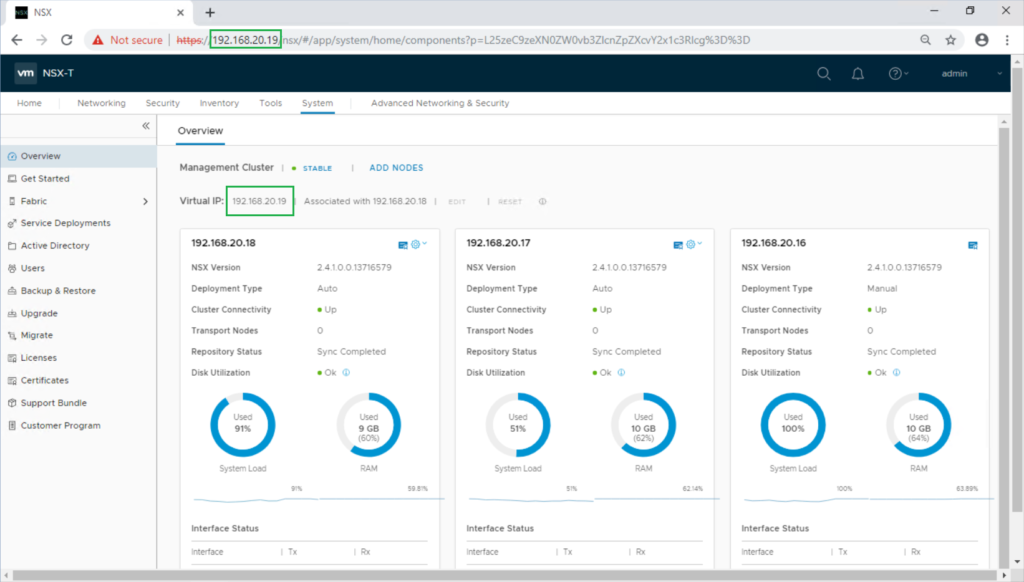
Finally you can access the GUI using the virtual IP address shared by all NSX manager nodes. https://<NSX_MGR_Cluster_VIP>
The cluster status and its nodes can be validated from System > Overview.
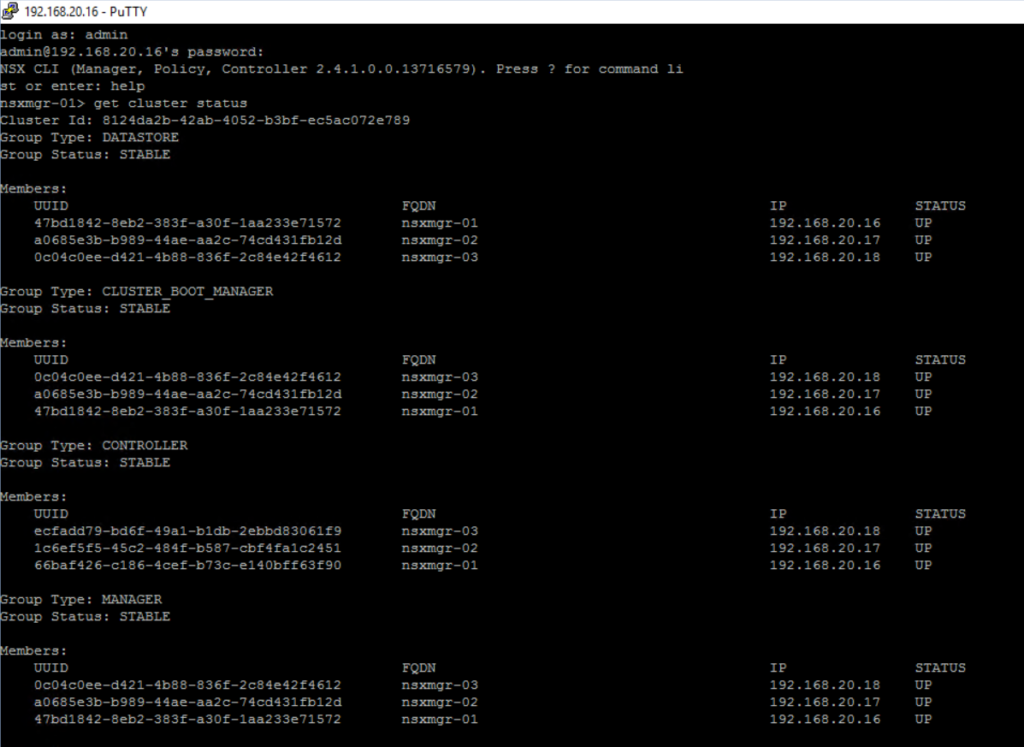
You can validate the management cluster via CLI as well. SSH into NSX-T manager appliance using admin credentials and issue this command: get cluster status
In the next post, we will work on IP pools, uplink profiles, N-vDS, transport node profiles, and ESXi host preparation. Stay tuned !!
Hope this post is informative,
Thanks for reading,
Mohamad Alhussein

Your NSX-T 2.4.1 install blog is very helpful. I hope you continue them.
Thank you Steve, Glad that you find them helpful.
Keep tuned, a couple of NSX-T posts will be published soon as I progress with my NSX-T homelab setup
This blog is very helpful for me to setting up NSX-T in my lab environment .Thank you Mohamad
Thank you very much Sampath, Happy to hear that from you. This motivates me to share more with the vCommunity.
Hi Muhamad, thank you so much for sharing such a beautiful and informative articles on NSX-T. If you categorize all of your work in Menus, it’d be easy for us to navigate. Thanks again for sharing!
Thank you Nisar, I really appreciate your kind feedback and I am happy to hear that my articles are informative for you and the community. I will try to organize my articles on Menus very soon whenever I got some time 🙂
Hi. Explanation clear and simple. Thanks for sharing you knowledge!
Thanks Emil for your kind feedback. Much appreciated.